But also please note the title of this article is not Camera 101. I learned bird photography by the seat of my pants, making every possible mistake multiple times. Because I’m neither technically inclined nor manually adept, if I had taken Camera 101 my eyes would have glazed over after a few pages. What I’d like to do in this article is shorten the learning curve for birders who’d like to hang stuff on their wall.
Below I’ve listed ten things for birders with cameras (as opposed to photography nerds who have suddenly discovered birds are photogenic) to digest, and I’ve salted the article with four photos hanging on my wall, each illustrating one of these key ideas. These ideas are only loosely sequential, and I consider all of equal importance.
Camera School Once A Month—This is as close to Camera 101 as I will go. Every camera has tens, if not hundreds, of special settings, only a dozen or so that you’ll ever use. Read your camera manual with your camera in your hands, making sure you understand everything it can do and why you might want to do it. Repeat this exercise once a month, religiously, to fix your mistakes and broaden your capabilities.
Study Your Losers—If you’re getting excited about your bird photography, blowing a good shot should be a bigger disappointment than not even seeing the bird. After you’ve studied your really bad images and figured out what just happened, make a folder in your computer and save them. Refer back to them often. It’s humbling, good for some laughs, and the best learning tool you’ll ever have.
Keep A Notebook—You did this in school, right? Do it now, too!. Record the shoot in a general way—date, time, location, weather, species, etc. Then, take the time to make entries after each image or series you shoot—mode, f/stop, ISO, shutter speed, and leave room to enter how each shot came out after you’ve seen it on the computer. Sounds tedious and time consuming, and you just want to go out and shoot, but this is how you learn from your losers and improve mistakes.
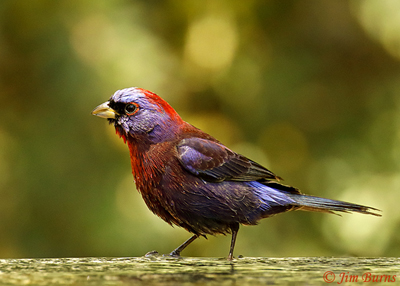
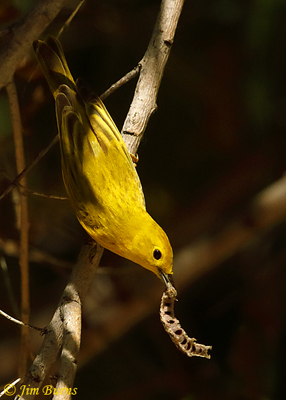
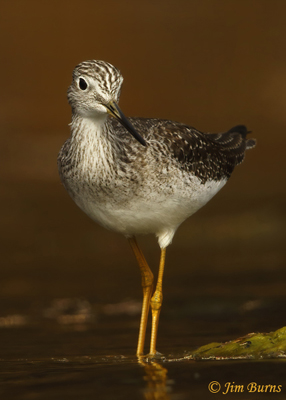
Focus Trumps Everything—I still hear people say they focus manually because they wear glasses or because those little twigs fool their auto focus. PLEASE! Use auto focus and get it on the bird’s eye. If the eye is sharp, no one will notice the tail. If the tail is sharp but the eye isn’t, they’ll wonder why you spent so much money on a crummy camera.
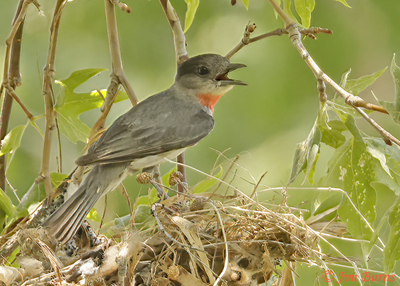
Study Your Subject—If you’re calling yourself a “birder,” you have books that will tell you everything you should know about plumage, behavior, habitat, seasonality, etc. The more you know the better your photography will get because you’ll be at the right place at the right time, knowing what species will be there and what they might be doing.
Point Your Shadow At The Bird—This is at once the simplest but most important technical aspect for bird shooters. Make it second nature. Direct light pops details and enhances color. There are times when you may have to sidelight a bird, and backlighting can be dramatic but, first and foremost, get the sun behind you if at all possible. And don’t forget the sun isn’t behind you at high noon. Midday light is harsh. Early morning and late afternoon light is called “golden” for a reason.